


Creating a Transit Gateway and related resources
To create a Transit Gateway and related resources:
- Create a Transit Gateway (TGW):
- In the AWS console, open the VPC service.
- Select Transit Gateways, then click the Create Transit Gateway button.
- In the Name tag field, enter the desired name.
- Deselect Default route table association and Default route table propagation to prevent undesired association into the security route.
- Edit Transit gateway CIDR blocks to enter the same CIDR range as the TGW-Subnet that you configured in Creating VPCs and subnets.

- Configure other fields as desired, then click Create.
- Wait for the TGW state to change from Pending to Available before proceeding.
-
Create two TGW route tables: one for the security VPC and another for the spokes:
- In the AWS console, open the VPC service.
- Select Transit Gateway Route Tables, then click the Create Transit Gateway Route Table button.
- In the Name tag field, enter the desired name.
- From the Transit Gateway ID dropdown list, select the Transit Gateway ID.
- Click Create.
- Repeat the process for the spoke route table.
- Create three TGW attachments, one for each VPC:
- In the AWS console, open the VPC service.
- Select Transit Gateway Attachments, then click the Create Transit Gateway Attachment button.
- From the Transit Gateway ID dropdown list, select the Transit Gateway ID.
- In the Attachment type field, select VPC.
- In the Attachment name tag field, enter the desired name.
- In the VPC ID field, enter the security VPC ID for the first attachment. This is TGW_Sec_VPC_Attachment in the screenshot.
- For Subnet IDs, select the TGW-Subnet of each availability zone (AZ) for the security VPC.
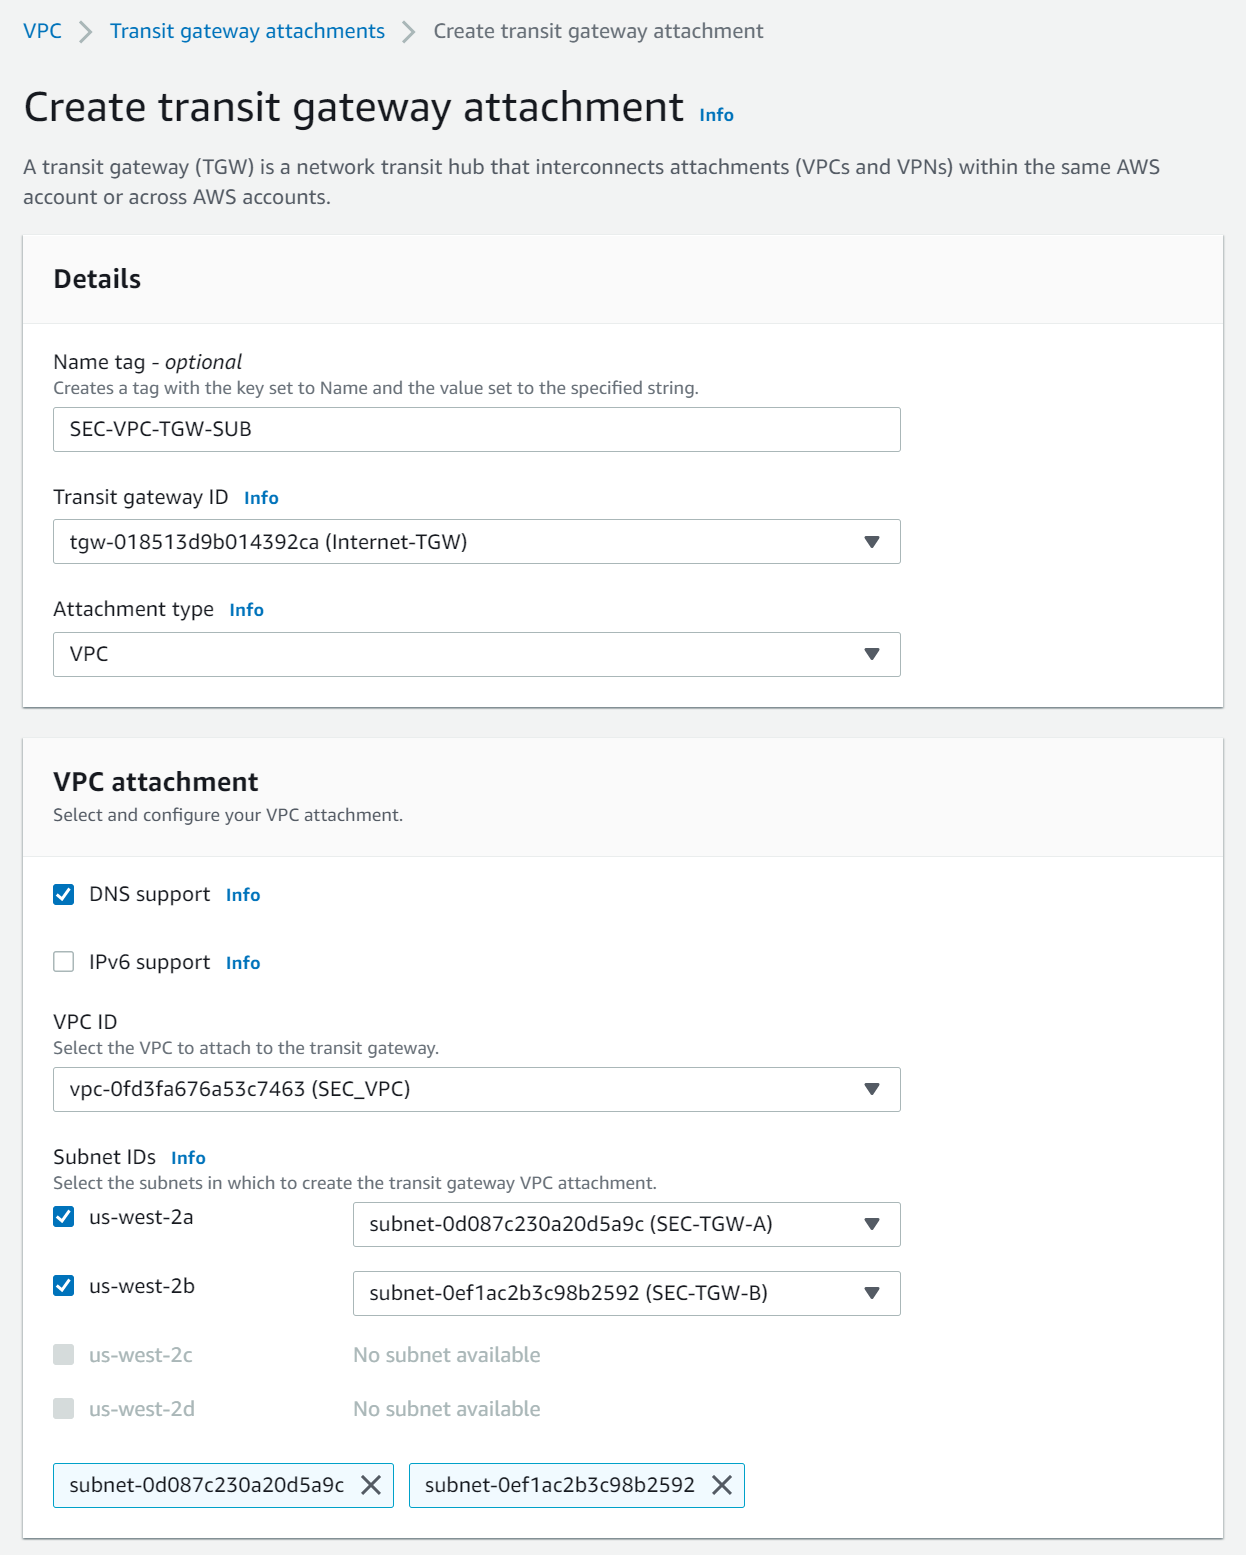
- Repeat the process for the other two VPC IDs, spokes A and B. For the subnet VPC attachment, select the corresponding AZ for each, then the Subnet ID dropdown list shows the spoke subnet that you created.
- Wait for the State to become Available.

- Create TGW associations:
- In the AWS console, open the VPC service.
- Select Transit Gateway Route Tables, then select the spoke route table.
- On the Associations tab, click the Create Association button.
- From the Choose attachment to associate dropdown list, select the spoke 1 VPC.
- Click Create association.
- Repeat the process for spoke B, which will be the second association for the route table.
- Wait for both associations to achieve the Associated state before proceeding.
- Next, select the security route table.
- Repeat the same as above to add the security VPC attachment to the security TGW route table. Click Create association.

You should associate the security attachment using the TGW-Subnets to the security route table. The spoke attachments will be associated to the spoke route table.
- Add routes to the security TGW route table:
- In the AWS console, open the VPC service.
- Select Transit Gateway Route Tables, then select the security route table.
- Add a static route for each spoke subnet and select spoke VPC attachments.
- Add routes to the spoke TGW route table:
- In the AWS console, open the VPC service.
- Select Transit Gateway Route Tables, then select the spoke route table.
- Add a static route for 0.0.0.0/0 to the security VPC attachment.
- Add specific null routes: Spoke1(A) subnet, Spok2(B) Subnet, and SEC-Public Subnets.
