


Creating an Address
Creating an Address consists of the following:
- Creating an “Address”, which will be used as an address group or single address to be used for source/destination of firewall policies. The Address is based on IP addresses.
- The Address contains IP addresses of GCP instances that are currently running.
- When changes occur on the instances, the SDN Connector populates and updates the changes automatically based on the specified filtering condition so administrators do not need to reconfigure the Address’s content manually
- Appropriate firewall policies using the Address are applied to the instances that are members of it.
The following describes creating an Address using the FortiOS GUI. If you are familiar with the FortiOS CLI, you an also create an Address using the CLI.
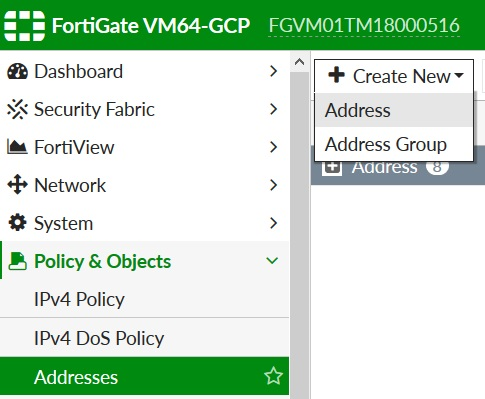
- In FortiOS, go to Policy & Objects > Addresses. Click Create New, then select Address.
- Configure the Address:
- Name: Enter the desired name.
- Type: Select Fabric Connector Address.
- Fabric Connector Type: Select Google Cloud Platform (GCP).
-
Filter: This means the SDN Connector automatically populates and updates only instances belonging to the specified VPN that match this filtering condition. Currently GCP supports the following filters:
-
id=<instance id>: This matches an VM instance ID. -
name=<instance name>: This matches a VM instance name. -
zone=<gcp zones>: This matches a zone name. -
network=<gcp network name>: This matches a network name. -
subnet=<gcp subnet name>: This matches a subnet name. -
tag=<gcp network tags>: This matches a network tag. -
label.<gcp label key>=<gcp label value>: This matches a free form GCP label key and its value.
In the example, the filter is set as
'network=default & zone=us-central-1f’. This configuration populates all IP addresses that belong to the default network in the zone us-central-1f.You can set filtering conditions using multiple entries with AND ("&") or OR ("|"). When both AND and OR are specified, AND is interpreted first, then OR.
Note that wildcards (such as the asterisk) are not allowed in filter values.
-
- Click OK.

The Address has been created. Wait for a few minutes before the setting takes effect. You will know that the Address is in effect when the exclamation mark disappears from the Address entry. When you hover over the Address, you can see the list of populated IP addresses.
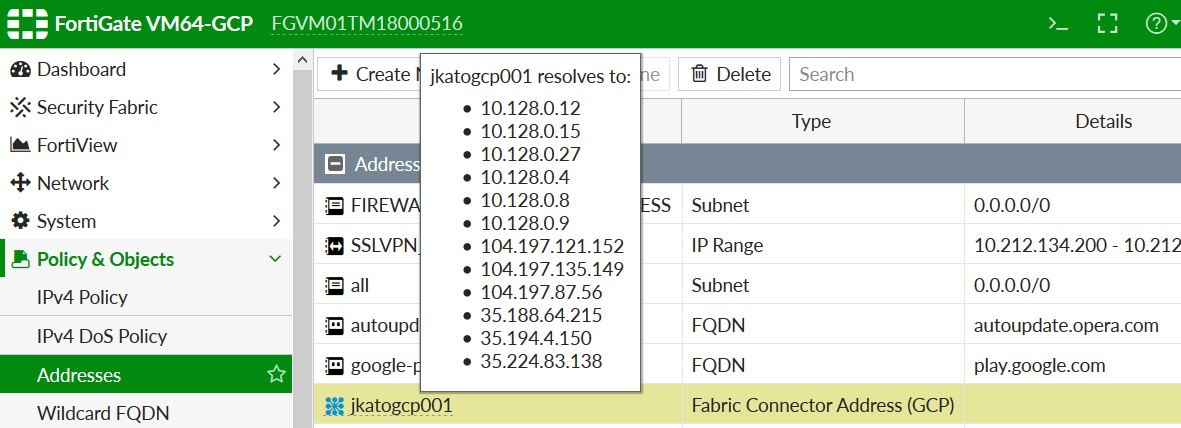
If the exclamation mark does not disappear, check the Address settings.