Initial deployment
- In the Google Cloud marketplace Cloud Launcher, find FortiGate Next-Generation Firewall.
Select BYOL or PAYG according to your needs.

- Click LAUNCH ON COMPUTE ENGINE.
- Configure the variables as required:
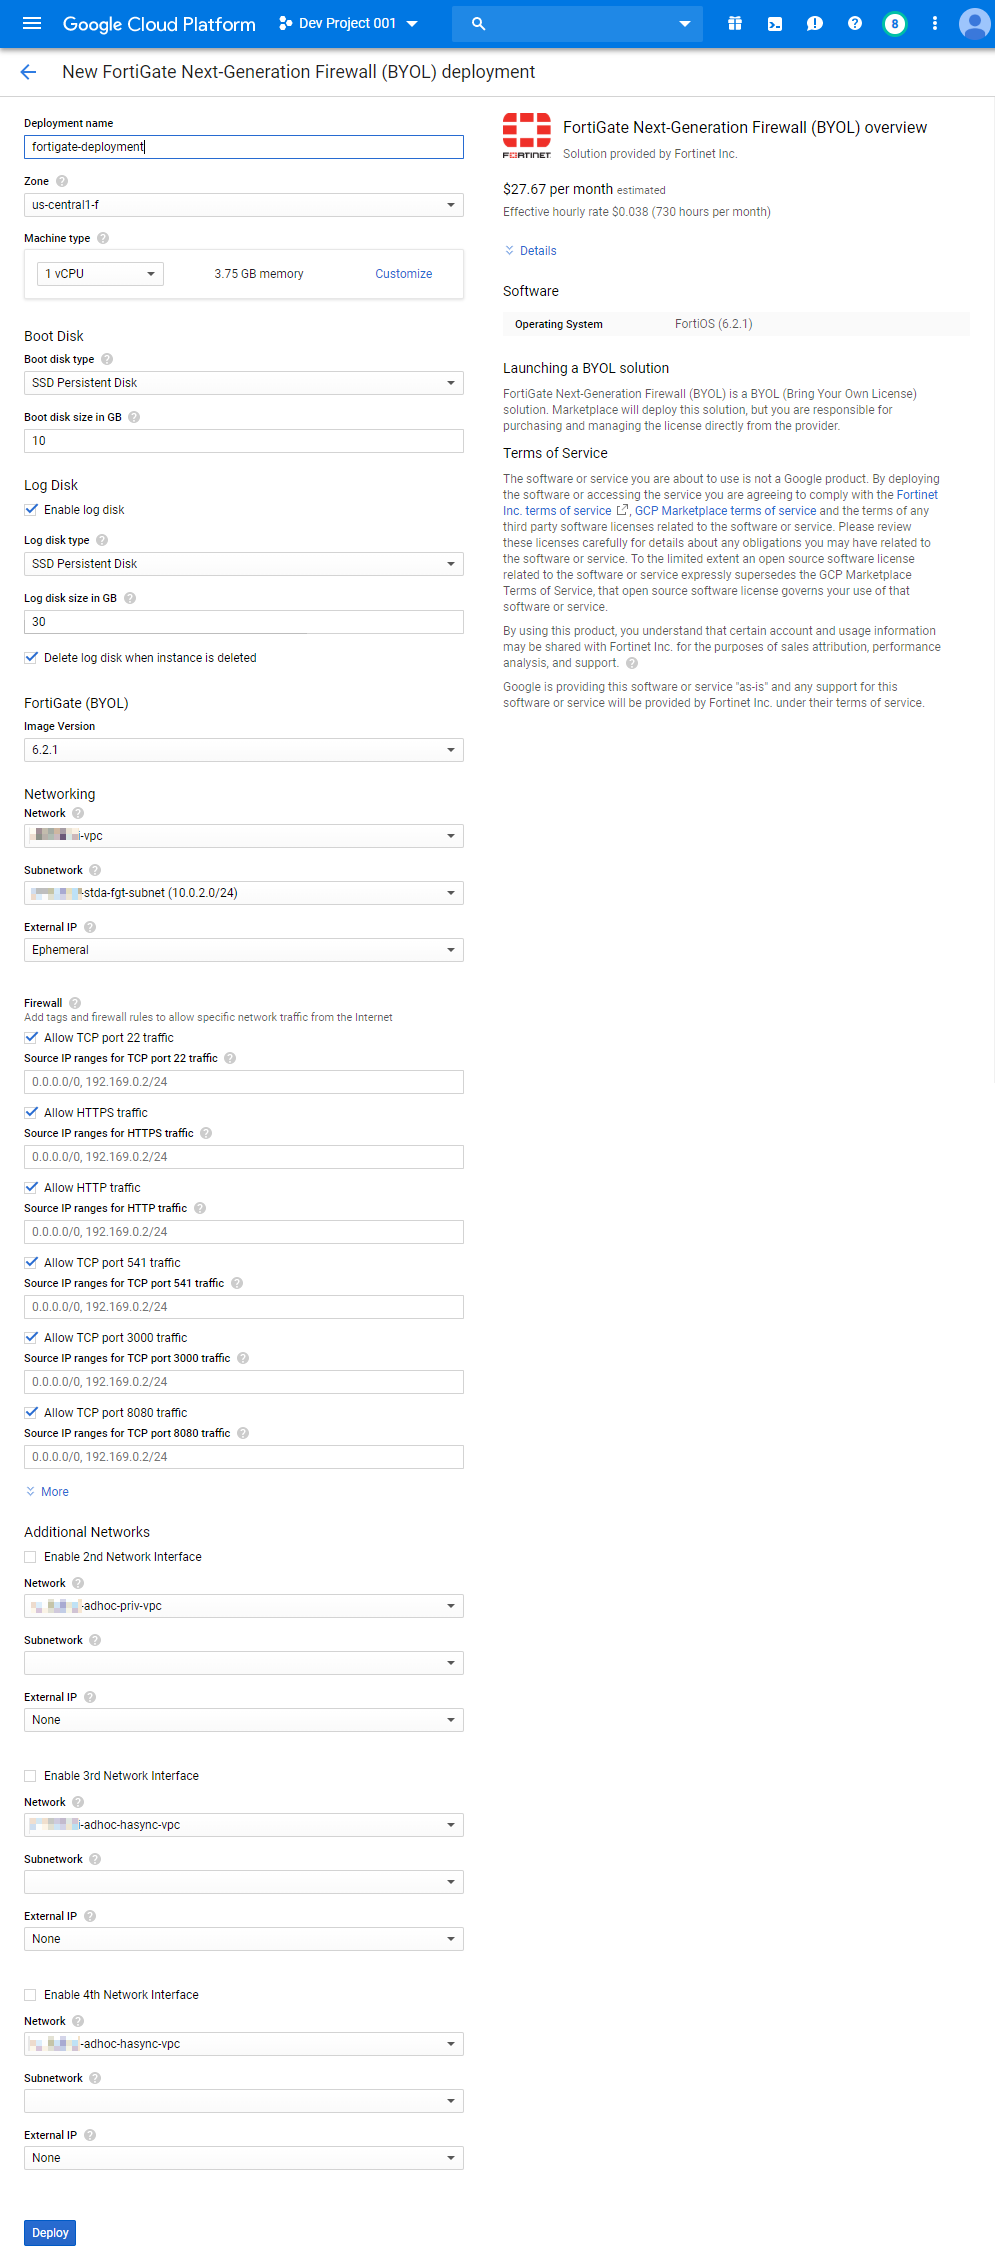
Deployment name
Enter the FortiGate-VM name to appear in the Compute Engine portal.
Zone
Choose the zone to deploy the FortiGate to.
Machine type
Choose the instance type required.
Boot disk type
Choose the desired boot disk type.
Boot disk size in GB
Leave as-is at 10 GB.
Network
Select the network located in the selected zone.
Subnetwork
Select the subnetwork where the FortiGate resides.
Firewall
Leave all selected as shown, or allow at least HTTPS if the strictest security is allowed in your network as the first setup. Change firewall settings as needed later on.
These are the open ports allowed in Google Cloud to protect incoming access to the FortiGate instance over the Internet and are not part of FortiGate firewall features.
External IP
Select Ephemeral. You must access the FortiOS GUI via this public IP address.
Enable log disk
Enable the log disk.
Log disk type
Select the desired log disk type.
Log disk size in GB
Select the desired log disk size or leave as-is at 30 GB.
Delete log disk when instance is deleted
If enabled, the log disk is removed once you delete the FortiGate-VM instance. To retain the log disk after FortiGate-VM instance deletion, leave this disabled.
Image Version
Select the FortiGate version. The latest version is the default.
Enable nth Network Interface
Enable extra network interfaces on the FortiGate-VM instance.
Network
Select the network located in the selected zone.
Subnetwork
Select the subnetwork where the network interface resides.
External IP
Select None. Select Ephemeral only if you want the interface to be publicly reachable
Leave the other options as shown.
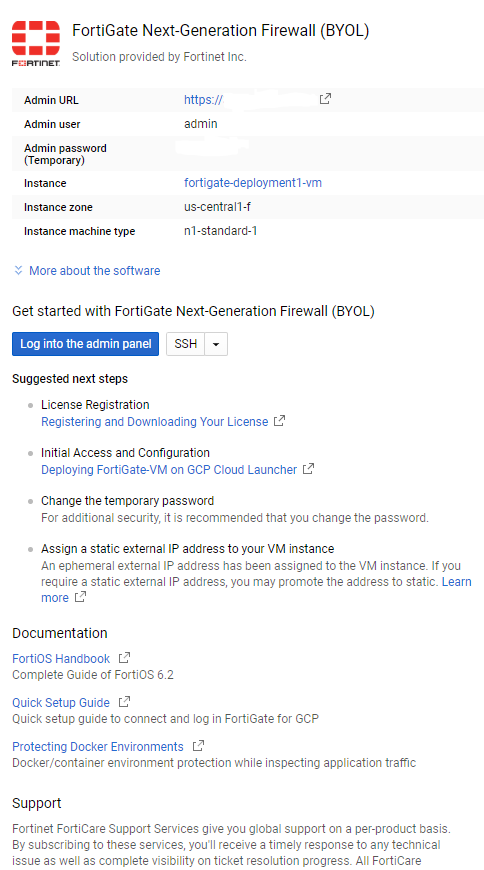
- Click Deploy. When deployment is done, the following screen appears.