Fortinet black logo

AWS Administration Guide

Setting up the FortiGate(s)

Copy Link
Copy Doc ID 9e3b59dc-ba0b-11e9-a989-00505692583a:243899
Download PDF

Setting up the FortiGate(s)

As a FortiGate-VM feature, GuardDuty integration introduces the ability to dynamically import external block lists from an HTTP server. You can use the block lists to enforce your organization's specialized security requirements. This can include long term policies, such as always blocking access to certain websites, or short term requirements to block access to known compromised locations. Since these lists are dynamically imported, the FortiGate-VM instantly imports any changes made to the list.

In this example, the FortiGate-VM integrates with AWS GuardDuty to populate a list, which is treated as a "threat feed". You can use a threat feed to deny access to a source or destination IP address in web filter and DNS filter profiles, SSL inspection exemptions, and as a source/destination in proxy policies. The block list is stored as an external resource, which is dynamically imported to the FortiGate-VM at a configured interval/refresh rate to maintain an updated list. The administrator can configure multiple threat feeds in each profile.

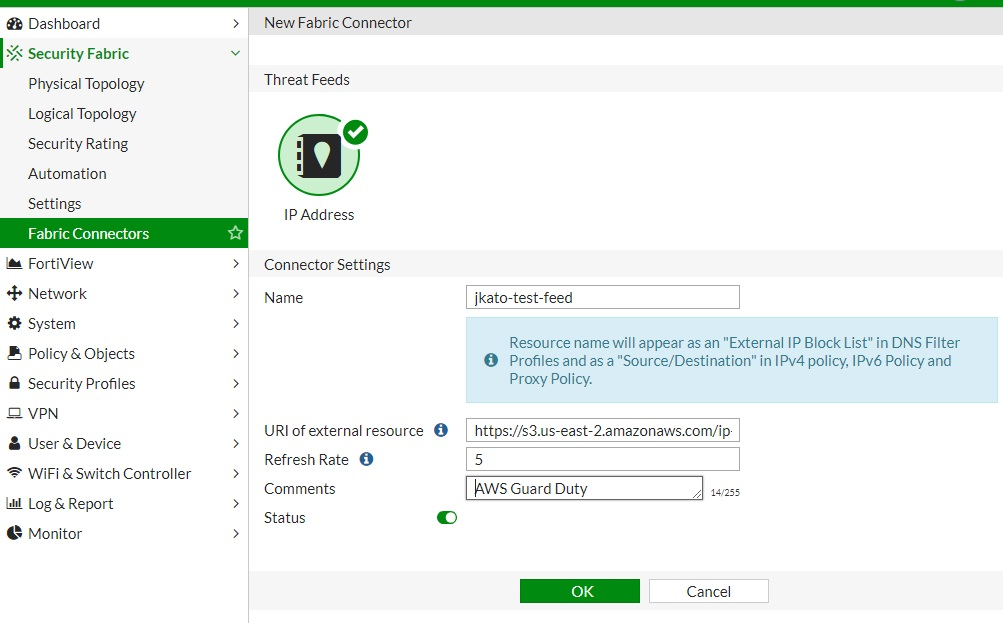
  1. To configure a threat feed, go to Security Fabric > Fabric Connectors, then click Create New, then IP Address under Threat Feeds.
  2. The following example creates an IP address connector. The resource name appears as an external IP block list in DNS filter profiles and as a source/destination in proxy policies. Configure the following:
    1. URI of external resource: link to an external resource file. The file should be a plain text file with one IP address on each line. In this example, the IP address is https://s3-us-east-1.amazonaws.com/***my-aws-lambda-guardduty***/ip_blocklist. The file size is up to 10 MB or 128000 lines of text, whichever is more restrictive.
    2. Refresh Rate: time interval to refresh the external resource. The rate can be between 1 to 43200 minutes.
  3. Go to Policy & Objects > IPv4 Policy and create/edit a policy. In the Source and Destination fields, you should be able to add the new feed.