Setting up a VM to be the FortiEDR Aggregator
Setting up a VM to be the FortiEDR Aggregator
To set up a VM to be the FortiEDR Aggregator:
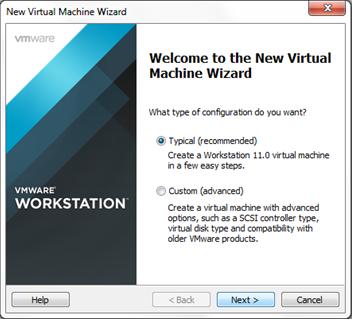
- Create a new virtual server by selecting File > New Virtual Machine.
- Select Typical option and select Next.
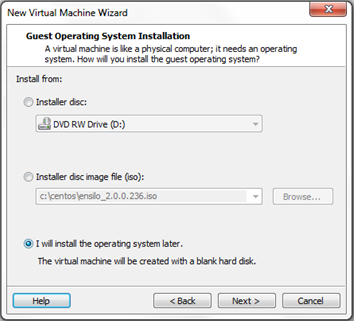
- Select the I will install the operating system later option and click Next.
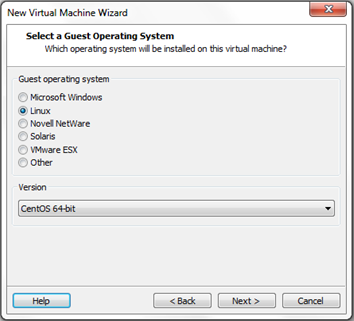
- Select the Linux radio button. In the Version field, select CentOS 7 64-bit and click Next.
- Specify a name for the virtual machine and the location in which to store the provided ISO file and click Next.

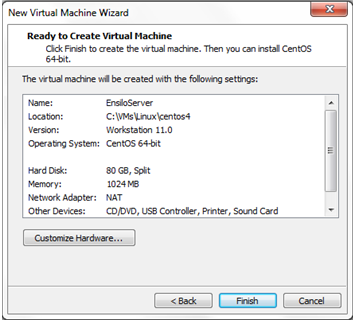
- Change the Maximum disk size according to system requirements listed in Appendix C – ON PREMISE DEPLOYMENTS, leave the default option as Split virtual disk into multiple files and click Next.

- Click Finish.
- Right-click the new machine and select the Settings option

- Select the Memory option and change the RAM according to the system requirements listed in Appendix C – ON PREMISE DEPLOYMENTS.
- Select the Processors option and change the value according to the system requirements.
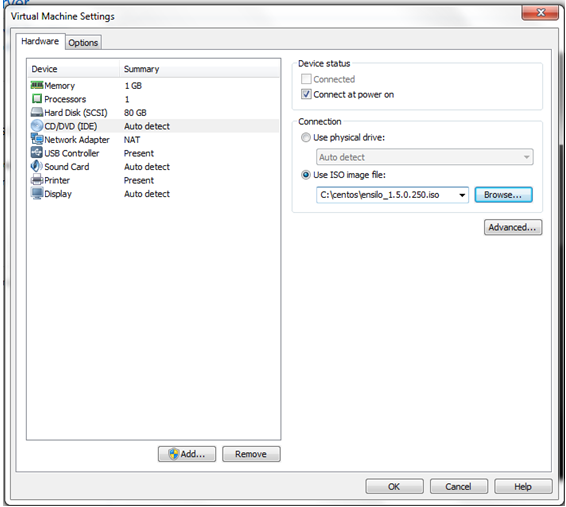
- Select the CD/DVD option and then select the Use ISO image file option on the right.
- Click the Browse button and select the ISO file provided by Fortinet for the FortiEDR Central Manager. Click OK.
- Start the virtual machine.

The virtual machine automatically starts the installation process, which may take a few minutes.
- Wait until a success message is displayed requesting that you reboot.
- Reboot the virtual machine.
- Log into the virtual machine in order to continue the installation process.
Login: root
Change the root password, by entering any password you want. Then re-type it. The password must be strong enough according to Linux standards.
- In the VM CLI, enter
fortiedr config.
- At the prompt, enter your
hostname and click Next. (Note: This can be any hostname)
- At the prompt, select aggregator to configure the VM as the Aggregator, and click Next.
- At the Please enter the management IP address prompt, enter the IP address to be used for communicating with the FortiEDR Central Manager and click Next.
- At the Please enter your registration password prompt, enter the user and password used to register the FortiEDR Aggregator with the FortiEDR Central Manager, which you configured in step 30 in the previous section, and click Next.
- At the Do you want to use DHCP prompt, select No to configure the IP of this virtual machine manually, and then click Next.
- At the prompt, enter the IP address of the machine that you are installing. Use the following format:
xxx.xxx.xxx.xxx/yy, where yy is the routing prefix of the subnet.
- At the prompt, enter the default gateway and click Next.
- At the Please set your DNS server prompt, enter a valid IP address and click Next. Use the following format:
xxx.xxx.xxx.xxx/yy, where yy is the routing prefix of the subnet.
- At the prompt, select No for debug mode.
- At the Please set the date prompt, verify the date and click Next. The installer automatically presents the current date. You can change this date, if necessary.
- At the Please set your Time prompt, set the time and click Next.
- At the prompt, select the timezone and country in which the server is being installed.
- Wait a few moments while the installation processes, until you see the Installation completed successfully message.
- If organizations are defined and the number of Collectors exceeds 10000, set up additional Aggregators by repeating the previous steps for each additional Aggregator.
- (Recommended) Define a DNS address for the Aggregator by following the steps below. Doing so avoids the need to reinstall all Collectors that are registered with the Aggregator IP when the Aggregator IP changes in some cases, such as when the Aggregator is migrated to a different data center.
- Define a DNS address for the Aggregator.
- Configure FortiEDR to disable the NAT IP and use the local IP of the Aggregator:
- Connnect to the FortiEDR Central Manager via
ssh. - Open the
conf-customer.properties configuration file using the following command: vi/opt/FortiEDR/aggregator/confcustomer.properties. - Comment out the
connection.dnsname = 10.10.80.201 line as follows:
#connection.dns-name =
			10.10.80.201
. - Save the changes and restart the FortiEDR Aggregator service using the
fortiedr aggregator restart command. - Check the status of the Aggregator using the
fortiedr aggregator status command.
Setting up a VM to be the FortiEDR Aggregator
To set up a VM to be the FortiEDR Aggregator:
- Create a new virtual server by selecting File > New Virtual Machine.
- Select Typical option and select Next.
- Select the I will install the operating system later option and click Next.
- Select the Linux radio button. In the Version field, select CentOS 7 64-bit and click Next.
- Specify a name for the virtual machine and the location in which to store the provided ISO file and click Next.
- Change the Maximum disk size according to system requirements listed in Appendix C – ON PREMISE DEPLOYMENTS, leave the default option as Split virtual disk into multiple files and click Next.
- Click Finish.
- Right-click the new machine and select the Settings option
- Select the Memory option and change the RAM according to the system requirements listed in Appendix C – ON PREMISE DEPLOYMENTS.
- Select the Processors option and change the value according to the system requirements.
- Select the CD/DVD option and then select the Use ISO image file option on the right.
- Click the Browse button and select the ISO file provided by Fortinet for the FortiEDR Central Manager. Click OK.
- Start the virtual machine.
The virtual machine automatically starts the installation process, which may take a few minutes.
- Wait until a success message is displayed requesting that you reboot.
- Reboot the virtual machine.
- Log into the virtual machine in order to continue the installation process.
Login: root
Change the root password, by entering any password you want. Then re-type it. The password must be strong enough according to Linux standards.
- In the VM CLI, enter
fortiedr config.
- At the prompt, enter your
hostname and click Next. (Note: This can be any hostname)
- At the prompt, select aggregator to configure the VM as the Aggregator, and click Next.
- At the Please enter the management IP address prompt, enter the IP address to be used for communicating with the FortiEDR Central Manager and click Next.
- At the Please enter your registration password prompt, enter the user and password used to register the FortiEDR Aggregator with the FortiEDR Central Manager, which you configured in step 30 in the previous section, and click Next.
- At the Do you want to use DHCP prompt, select No to configure the IP of this virtual machine manually, and then click Next.
- At the prompt, enter the IP address of the machine that you are installing. Use the following format:
xxx.xxx.xxx.xxx/yy, where yy is the routing prefix of the subnet.
- At the prompt, enter the default gateway and click Next.
- At the Please set your DNS server prompt, enter a valid IP address and click Next. Use the following format:
xxx.xxx.xxx.xxx/yy, where yy is the routing prefix of the subnet.
- At the prompt, select No for debug mode.
- At the Please set the date prompt, verify the date and click Next. The installer automatically presents the current date. You can change this date, if necessary.
- At the Please set your Time prompt, set the time and click Next.
- At the prompt, select the timezone and country in which the server is being installed.
- Wait a few moments while the installation processes, until you see the Installation completed successfully message.
- If organizations are defined and the number of Collectors exceeds 10000, set up additional Aggregators by repeating the previous steps for each additional Aggregator.
- (Recommended) Define a DNS address for the Aggregator by following the steps below. Doing so avoids the need to reinstall all Collectors that are registered with the Aggregator IP when the Aggregator IP changes in some cases, such as when the Aggregator is migrated to a different data center.
- Define a DNS address for the Aggregator.
- Configure FortiEDR to disable the NAT IP and use the local IP of the Aggregator:
- Connnect to the FortiEDR Central Manager via
ssh. - Open the
conf-customer.properties configuration file using the following command: vi/opt/FortiEDR/aggregator/confcustomer.properties. - Comment out the
connection.dnsname = 10.10.80.201 line as follows:
#connection.dns-name =
			10.10.80.201
. - Save the changes and restart the FortiEDR Aggregator service using the
fortiedr aggregator restart command. - Check the status of the Aggregator using the
fortiedr aggregator status command.


