


Integration with FortiGate over Webhook
This topic describes how to integrate FortiDeceptor with FortiGate versions 6.4 and 7.0. The GUI may vary depending the version of FortiGate/FortiOS you are using. For more information about Automation Stitches, select the version of FortiGate / FortiOS Administration Guide you are using in the Fortinet Document Library.
To integrate FortiDeceptor with FortiGate over Webhook:
- Configure the API key on FortiGate.
- Configure Webhook on FortiGate 6.4.x .
- Configure Webhook on FortiGate 7.0.x .
- Configure FortiDeceptor to integrate with FortiGate over Webhook.
1. Configure the API key on FortiGate
- In FortiGate, go to System > Administrators and select a user.
- Next to API Key, click Regenerate, then copy the API key.

2. Configure Webhook on FortiGate 6.4.x
For information about creating and editing webhooks in FortiGate, see Automation webhook stitches in the FortiGate / FortiOS 6.4.0 Administration Guide.
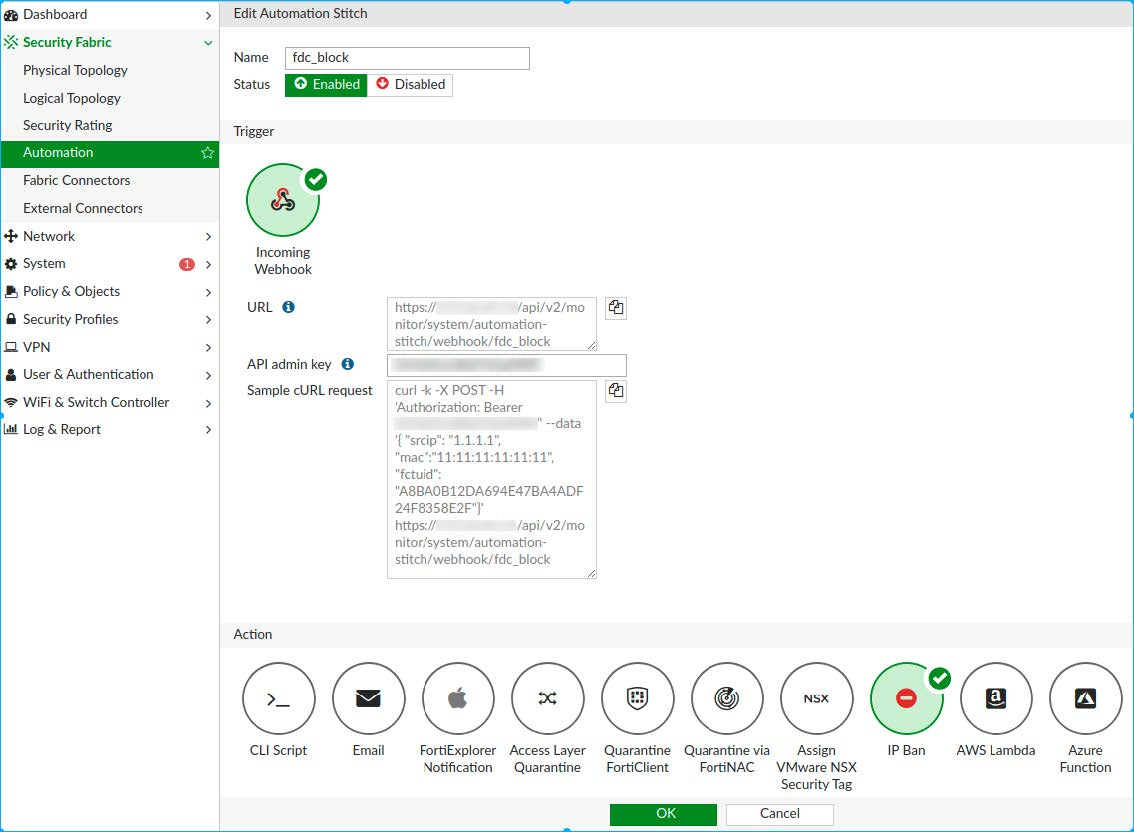
2.1 Configure the incoming webhook for block action
- Go to Security Fabric > Automation.
- Create a new Automation Stitch
- In the toolbar, click Create New.
- Under Trigger click Incoming Webhook.
- Under Action, click IP Ban.
- In the API admin key field, enter the API key you recorded in Step 1. Configure the API key on FortiGate . A Sample cURL request is created.
- Copy the Sample cURL request.
- Execute the request:
- Edit the sample cURL you recorded in the previous step.
- Edit parameters to the data field (
“srcip”,"mac"and"fctuid"), and then execute the request.
root@pc:~# curl -k -X POST -H 'Authorization: Bearer cfgtct1mmx3fQxr4khb994p7swdfmk' --data '{ "mac":"0c:0a:00:0c:ce:b0", "fctuid": "0000BB0B0ABD0D00B0D0A0B0E0F0B00B"}' https://172.16.116.226/api/v2/monitor/system/automation-stitch/webhook/Incoming%20Webhook%20Quarantine
{
"http_method":"POST",
"status":"success",
"http_status":200,
"serial":"FGT00E0Q00000000",
"version":"v6.4.0",
"build":1545
|
|
Encode the spaces in the automation-stitch name with |
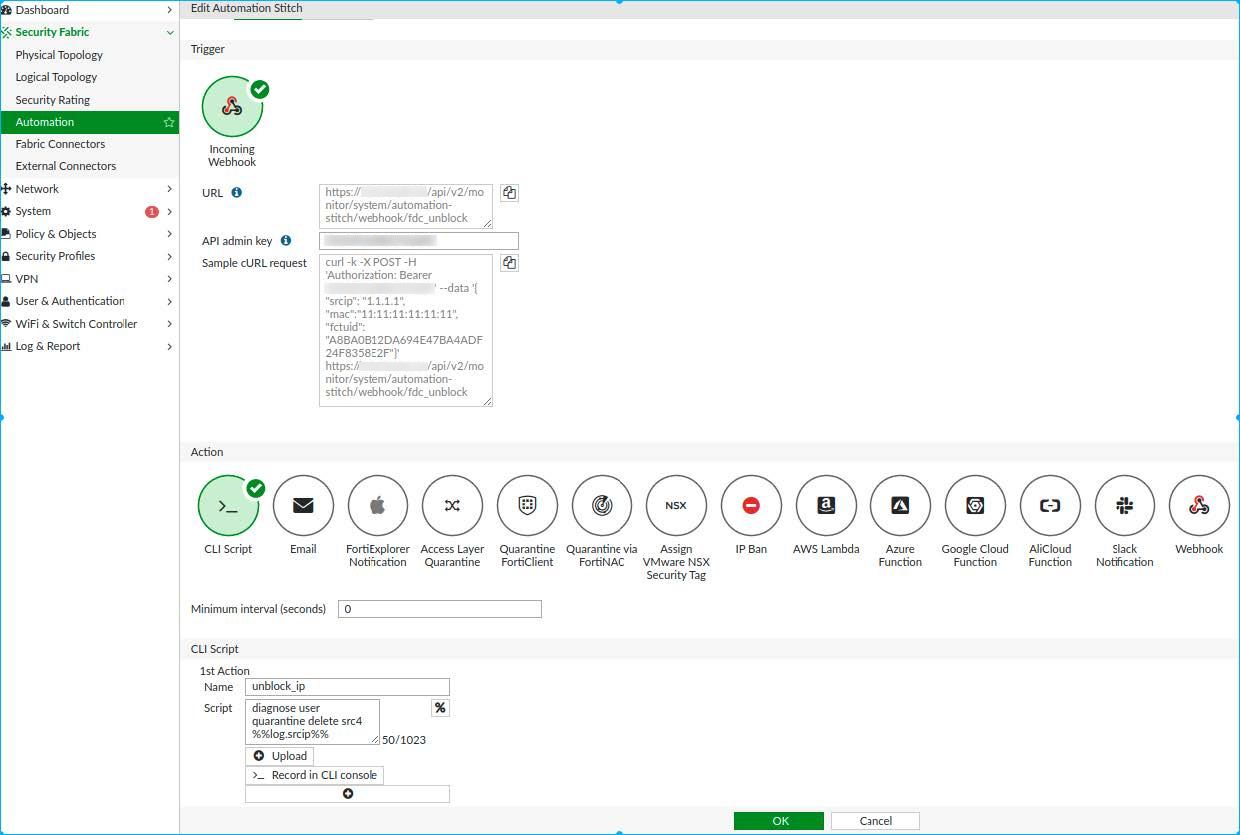
2.2 Configure the incoming webhook for unblock action
- Go to Security Fabric > Automation.
- Create a new Automation Stitch
- In the toolbar, click Create New.
- Under Trigger click Incoming Webhook.
- Under Action, click CLI Script.
- Under CLI Script, in the Script field enter the following command:
diagnose user quarantine delete src4 %%log.srcip%% - In the API admin key field, enter the API key you recorded in the previous Step 1. Configure the API key on FortiGate . A Sample cURL request is created.
2.3 Review the configuration on FortiGate side
In FortiGate, go to Security Fabric > Automation and verify the Status for the block and unblock webhooks are Enabled.

3. Configure Webhook on FortiGate 7.0.x
3.1 Configure the incoming webhook for block automation
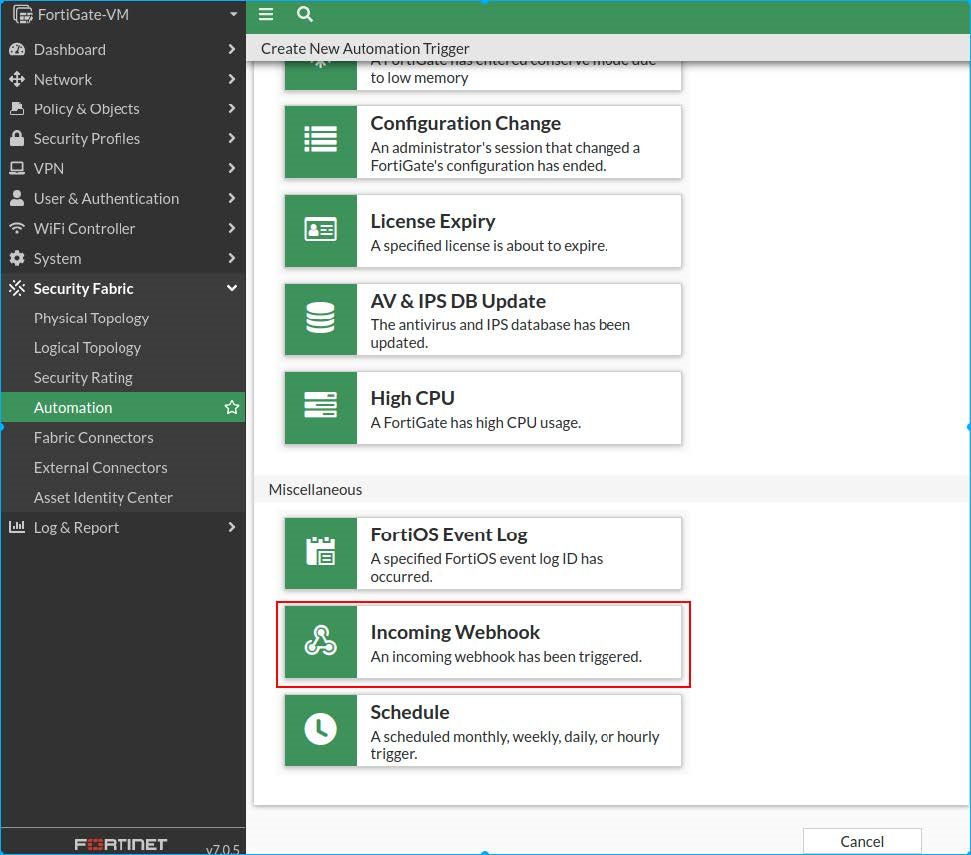
- Go to Security Fabric > Automation.
- In the banner, click Trigger > Create New. The Create New Automation Trigger page opens.
- Click Incoming Webhook. The
Create New Automation Trigger dialog opens.
-
Give the trigger a descriptive name such as
fdc_block_triggerand click OK. - Enter the API admin key and click OK.

3.2 Create block stitch with the block trigger
- Go to Security Fabric > Automation.
- In the banner, click Stitch > Create New. The Create New Automation Stitch page opens.
- Click Add Trigger. The Select Entries pane opens.
- Select the
fdc_block_triggeryou created and click Apply.
- Click Add Action. The Select Entries pane opens.
- Click Create. The Create New Automation Trigger windows opens.
- Click IP Ban. Enter a Name such as
banipand click OK. - Select the action you created (
banip), click Apply and click OK.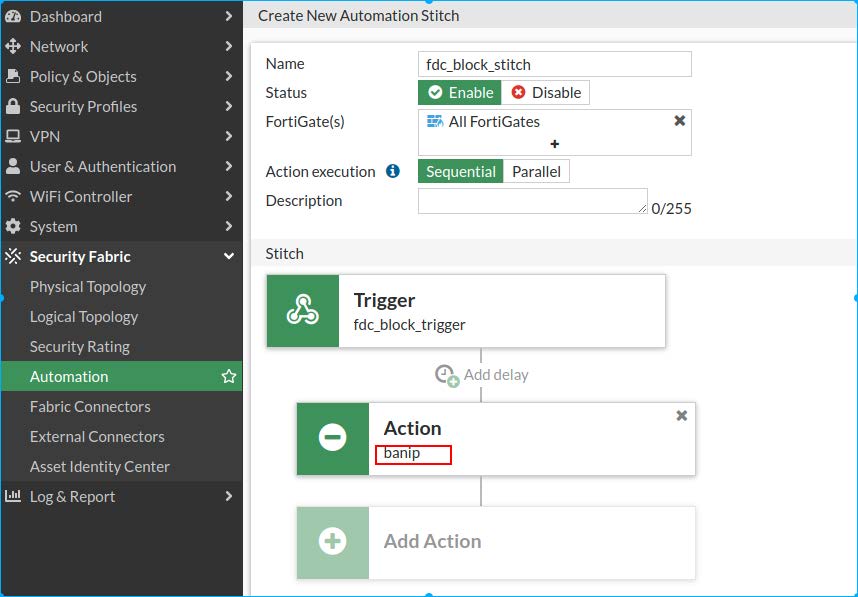
3.3 Configure the incoming webhook for unblock automation
- Go to Security Fabric > Automation.
- In the banner, click Trigger > Create New. The Create New Automation Trigger page opens.
- Click Incoming Webhook. The Create New Automation Trigger dialog opens.
-
Give the Trigger a descriptive name such as
fdc_unblock_triggerand click OK. - Enter the API admin key and click OK.

3.4 Create unblock action with CLI script
- Go to Security Fabric > Automation.
- In the banner, click Stitch > Create New. The Create New Automation Stitch page opens.
- Click Add Trigger. The Select Entries pane opens.
- Select the
fdc_unblock_triggeryou created and click Apply. - Click Add Action. The Select Entries pane opens.
- Click Create. The Create New Automation Trigger windows opens.
- In the Search field enter
CLIand click the CLI Script tile. The Create New Automation Action opens. - Click IP Ban. Enter a Name such as
fdc_unblock_ip. - In the Script field enter the following command:
diagnose user quarantine delete src4 %%log.srcip%%.
- Click OK.
- Click Add Action. From the Add Entries pane, select the Action you created (
fdc_unblock_ip) and click Apply.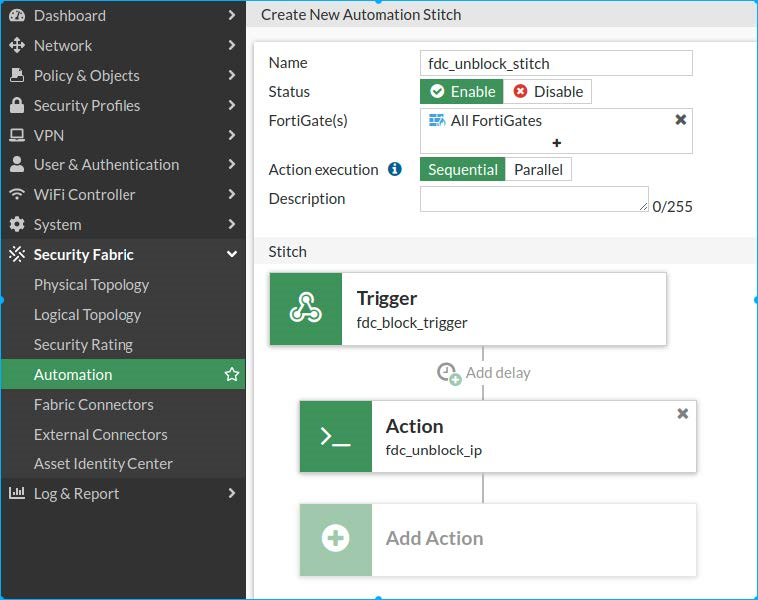
4. Configure FortiDeceptor to integrate with FortiGate over Webhook
-
In FortiDeceptor, go to Fabric > Quarantine Integration and click Quarantine Integration With New Device.
- Configure the integration settings and click Save.
Integrate Method Select FGT-WEBHOOK. Block Action URL Enter the webhook URL from FortiGate. Authorization Enter the API key from FortiGate. Unblock Action URL Enter the webhook URL from FortiGate. Authorization Enter the API key from FortiGate. 
- Ensure the integration Status is Ready.