Fortinet black logo
23.1.0

Create FortiConverter Service Ticket

Create FortiConverter Service Ticket

After your verify that your FGT/FWF device(s) have FortiConverter Service entitlement, you can create conversion service ticket to process configuration migration for your registered devices.

If this is your first time accessing FortiConverter Service Portal, please see FortiConverter Service Portal Access.

If you can access the FortiConverter Service Portal, please continue below to submit a conversion ticket.

Conversion Service Ticket Wizard

  1. Log in to FortiConverter Service Portal with your FortiCloud account user name and password - https://service.forticonverter.com/
  2. In Devices tab, look for your "FGT/FWF" devices.

    If the device has FortiConverter Service Entitlement, Create Ticket button will be available for the device on the page.

    Click Create Ticket to enter ticket creation wizard.

    This is a one-time only conversion service, you can only create one service ticket within 12 months of your service contract registration date.

  3. Please review and update the pre-filled customer email address and name fields. Fill the Customer Work Phone field, and click Next Step.
  4. Note: You can also add more email recipients and phone numbers, please input each one after another separated by space. Email notification covers all ticket change status and new posts/comments updated by Fortinet service team staff.

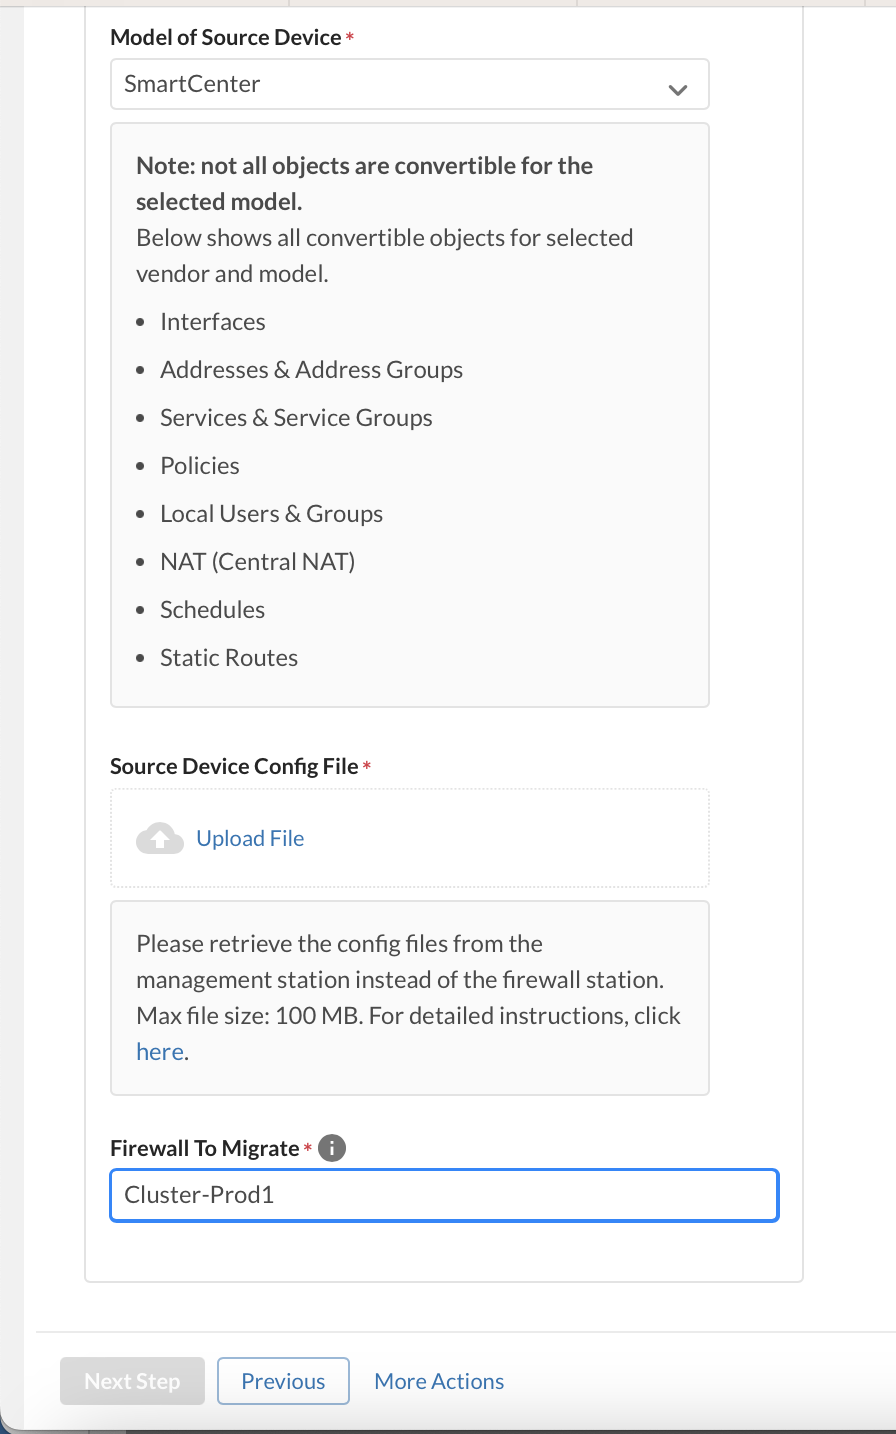
  5. From the left panel, select source device vendor and model, click browse to upload source configuration file(s) from your local PC.

    Click FortiOS Version for <SN> drop down menu to select the target platform FortiOS version.

    Note: Check Point conversion requires firewall or firewall cluster name, this can avoid back and forth confirmation during the ticket processing.
  6. Drag and drop the physical interface from right to left. If some of the interfaces are no longer in-use, you can consider marking them as (Do not migrate).

    Various interface types extracted from the source config file will be displayed, such as vlan, tunnel, aggregate, redundant, and switch interfaces.

  7. Review Interface Migration: This page displays how the interfaces look like after the configuration migration to the target FGT/FWF device.
  8. Please update interface settings by clicking the button.

  9. Select target FortiGate’s management interface, configure interface IP address, administrative access and an optional static route, and click Next Step.
  10. Add special migration instructions if necessary (optional). Review the service ticket summary and click Create Ticket.
  11. The last page will show that you have created the ticket successfully, click View Ticket Detail to enter the ticket details page.
After service ticket is created, please refer to Review FortiConverter Service Ticket

Create FortiConverter Service Ticket

After your verify that your FGT/FWF device(s) have FortiConverter Service entitlement, you can create conversion service ticket to process configuration migration for your registered devices.

If this is your first time accessing FortiConverter Service Portal, please see FortiConverter Service Portal Access.

If you can access the FortiConverter Service Portal, please continue below to submit a conversion ticket.

Conversion Service Ticket Wizard

  1. Log in to FortiConverter Service Portal with your FortiCloud account user name and password - https://service.forticonverter.com/
  2. In Devices tab, look for your "FGT/FWF" devices.

    If the device has FortiConverter Service Entitlement, Create Ticket button will be available for the device on the page.

    Click Create Ticket to enter ticket creation wizard.

    This is a one-time only conversion service, you can only create one service ticket within 12 months of your service contract registration date.

  3. Please review and update the pre-filled customer email address and name fields. Fill the Customer Work Phone field, and click Next Step.
  4. Note: You can also add more email recipients and phone numbers, please input each one after another separated by space. Email notification covers all ticket change status and new posts/comments updated by Fortinet service team staff.

  5. From the left panel, select source device vendor and model, click browse to upload source configuration file(s) from your local PC.

    Click FortiOS Version for <SN> drop down menu to select the target platform FortiOS version.

    Note: Check Point conversion requires firewall or firewall cluster name, this can avoid back and forth confirmation during the ticket processing.

  6. Drag and drop the physical interface from right to left. If some of the interfaces are no longer in-use, you can consider marking them as (Do not migrate).

    Various interface types extracted from the source config file will be displayed, such as vlan, tunnel, aggregate, redundant, and switch interfaces.

  7. Review Interface Migration: This page displays how the interfaces look like after the configuration migration to the target FGT/FWF device.
  8. Please update interface settings by clicking the button.

  9. Select target FortiGate’s management interface, configure interface IP address, administrative access and an optional static route, and click Next Step.
  10. Add special migration instructions if necessary (optional). Review the service ticket summary and click Create Ticket.
  11. The last page will show that you have created the ticket successfully, click View Ticket Detail to enter the ticket details page.
After service ticket is created, please refer to Review FortiConverter Service Ticket