


Creating an SSL VPN connection
The following describes three ways to create a VPN connection on FortiClient (Android):
- Manually configure the VPN settings in the FortiClient (Android) app. See To manually configure the VPN settings in the FortiClient (Android) app:.
- Receive VPN configuration from EMS. See To receive VPN configuration from EMS:.
- Receive VPN configuration from FortiOS as a QR code. See To receive VPN configuration from FortiOS as a QR code:.
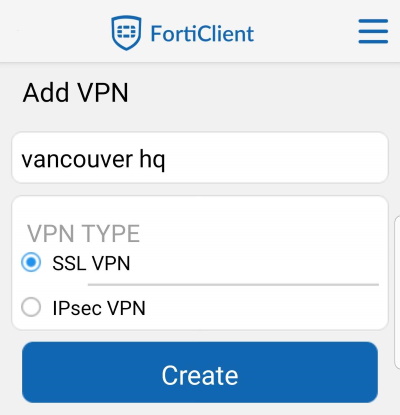
To manually configure the VPN settings in the FortiClient (Android) app:
- In the upper right corner, select the menu icon, then select VPN.
- Select New VPN from the toolbar in the bottom of the page.

- Enter a name for the new VPN connection, select SSL VPN under VPN Type, and select Create.
The SSL VPN settings page displays.
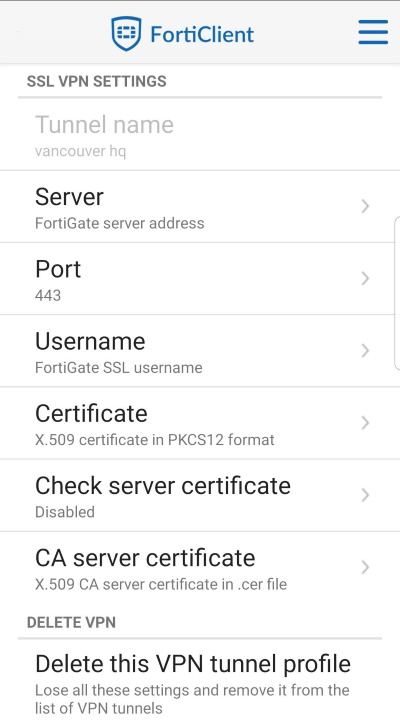
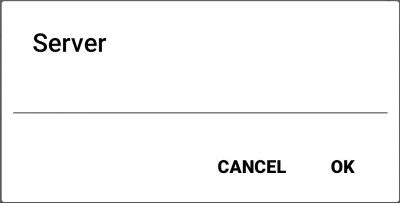
- Select Server, enter the server IP address or domain name, and select OK.
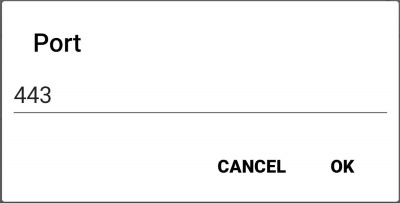
- Select Port, enter the port number, and select OK. The default port is 443.
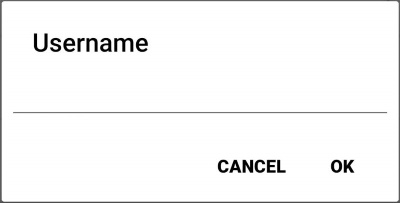
- Select Username, enter a username, and select OK.
To receive VPN configuration from EMS:
In the following instructions, the FortiClient (Android) end user takes some steps, while the FortiClient EMS administrator takes others.
- (FortiClient (Android) end user) Connect FortiClient (Android) to EMS. See Launching FortiClient (Android) for the first time.
- (EMS administrator) Configure an endpoint profile in EMS to apply to the Android device.
- (EMS administrator) Configure the desired SSL VPN settings in the profile that they created in step 2. See SSL VPN.
To receive VPN configuration from FortiOS as a QR code:
The following instructions assume that an SSL VPN exists on the FortiGate. For information on creating a new tunnel in FortiOS, see SSL VPN. The FortiOS VPN settings that this example uses demonstrates the FortiClient QR code functionality. The example also assumes that FortiClient (Android) is already installed on the device.
In the following instructions, some step are taken by the FortiClient (Android) end user, while other steps are taken by the FortiOS administrator.
In the following example, the following settings have already been configured:
- A user group named SSL_VPN_Employee, which contains one user
- Authentication/portal mapping for the SSL_VPN_Employee user group
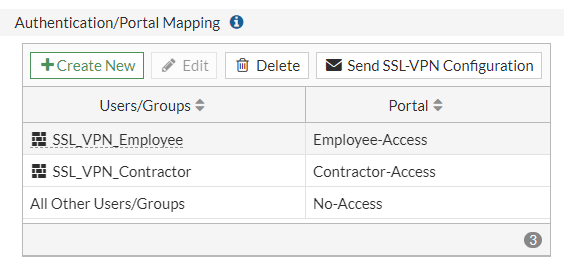
- A policy that permits traffic from the SSL VPN tunnel
-
(FortiOS administrator) Do one of the following:
- Go to VPN > SSL-VPN Settings. Under Authentication/Portal Mapping, click Send SSL-VPN Configuration.
- Go to User & Authentication > User Definition. Edit the desired user, then click Send SSL-VPN Configuration on the right pane.
- (FortiOS administrator) In the VPN Name field, enter the desired name to appear in the FortiClient (Android) VPN menu.
- (FortiOS administrator) In the Host field, enter the IP address that FortiClient (Android) will attempt to connect to. By default, this field displays the IP address of the interface that SSL VPN is configured on.
- (FortiOS administrator) If desired, click Edit SSL-VPN Provision User Email to customize the message. The default email looks as follows:

- (FortiOS administrator) Under Recipients, enter email address(es) as desired. You must manually enter an email address if no user or user in a user group has an email address associated with the user account.
- (FortiOS administrator) Click Send.

- (FortiClient (Android) end user) Open FortiClient (Android) on the mobile device.
- (FortiClient (Android) end user) Select the menu icon in the upper right corner, then select Scan QR Code.
- (FortiClient (Android) end user) Scan the QR code in the email that you received. The VPN tunnel list now includes the new VPN configuration from FortiOS.
