Configuring a captive portal policy on FortiAuthenticator
Configuring a captive portal policy on FortiAuthenticator
To configure an allow access captive portal policy:
- Go to Authentication > Portals > Policies, click Captive Portal and Create New.
- In the Policy type tab:
- Enter a name for the policy. Optionally, enter a description for the policy.
- In Type, select Allow captive portal access. Copy the URL and keep it on Notepad. The URL needs to be entered in the FortiGate configuration later.
- Choose a portal created in Creating a guest portal on FortiAuthenticator.
- Click Next.

-
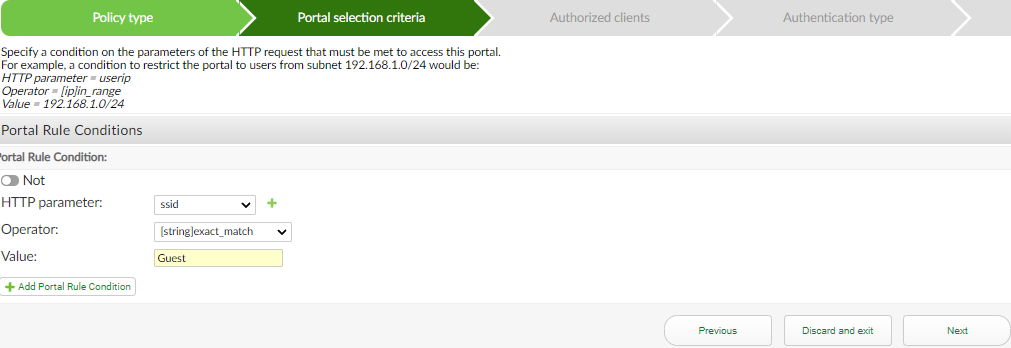
In the Portal selection criteria tab:
- In the HTTP parameter dropdown, select ssid to match.
- In the Operator dropdown, select [string]exact_match.
- In Value, enter the name of the SSID configured on the FortiGate. Here,
Guest.
- Click Next.
- In the Authorized clients tab:
- From Access points, select the access point defined in Access points.
- From RADIUS clients, select the FortiGate RADIUS client defined in RADIUS clients.
- Click Next.

- In the Authentication type tab, select Password/OTP authentication, then enable Local/remote user to verify credentials against one of the local or remote user accounts, and click Next.

- In the Identity sources tab:
- For Username format, select username@realm.
- For Realms, select local realm. Optionally, enable Filter, click the pen icon, and from Available User Groups, move the group created in User Group to Chosen User Groups.
- Click Next.

- In the Authentication Factors tab, click Next.
- In the RADIUS response tab, review the policy, and click Save and exit.
Configuring a captive portal policy on FortiAuthenticator
To configure an allow access captive portal policy:
- Go to Authentication > Portals > Policies, click Captive Portal and Create New.
- In the Policy type tab:
- Enter a name for the policy. Optionally, enter a description for the policy.
- In Type, select Allow captive portal access. Copy the URL and keep it on Notepad. The URL needs to be entered in the FortiGate configuration later.
- Choose a portal created in Creating a guest portal on FortiAuthenticator.
- Click Next.
-
In the Portal selection criteria tab:
- In the HTTP parameter dropdown, select ssid to match.
- In the Operator dropdown, select [string]exact_match.
- In Value, enter the name of the SSID configured on the FortiGate. Here,
Guest.
- Click Next.
- In the Authorized clients tab:
- From Access points, select the access point defined in Access points.
- From RADIUS clients, select the FortiGate RADIUS client defined in RADIUS clients.
- Click Next.
- In the Authentication type tab, select Password/OTP authentication, then enable Local/remote user to verify credentials against one of the local or remote user accounts, and click Next.
- In the Identity sources tab:
- For Username format, select username@realm.
- For Realms, select local realm. Optionally, enable Filter, click the pen icon, and from Available User Groups, move the group created in User Group to Chosen User Groups.
- Click Next.
- In the Authentication Factors tab, click Next.
- In the RADIUS response tab, review the policy, and click Save and exit.


