


Launching FortiAuthenticator-VM from EC2 Console
This section details how to launch FortiAuthenticator-VM from the EC2 Management Console. Before proceeding, ensure that you have configured a virtual private cloud (VPC) to use with the FortiAuthenticator-VM and that a key pair has been created and can be assigned to your instance. To create and download a key pair, from the EC2 Management Console, under Network & Security, click Key Pairs.
- From the AWS Management Console, go to Services > EC2.
- From the EC2 Management Console, under Launch instance dropdown, click Launch instance.
- For Step 1: Choose an Amazon Machine Image (AMI), click AWS Marketplace, and in the Search field, type
FortiAuthenticatorand press Enter. - To the right of Fortinet FortiAuthenticator (BYOL), click Select.

- Review the details of the Fortinet FortiAuthenticator image, and then click Continue.
- For Step 2: Choose an Instance Type, select an instance type appropriate for your intended usage, and then click Next: Configure Instance Details.
- For Step 3: Configure Instance Details, set the attributes for your instance:
- From the Network dropdown, select your VPC.
- From the Subnet dropdown, select the subnet associated to your VPC.
- From the Auto-assign Public IP dropdown, select Enable.
- Under Network interfaces, for Primary IP, enter
192.168.1.99.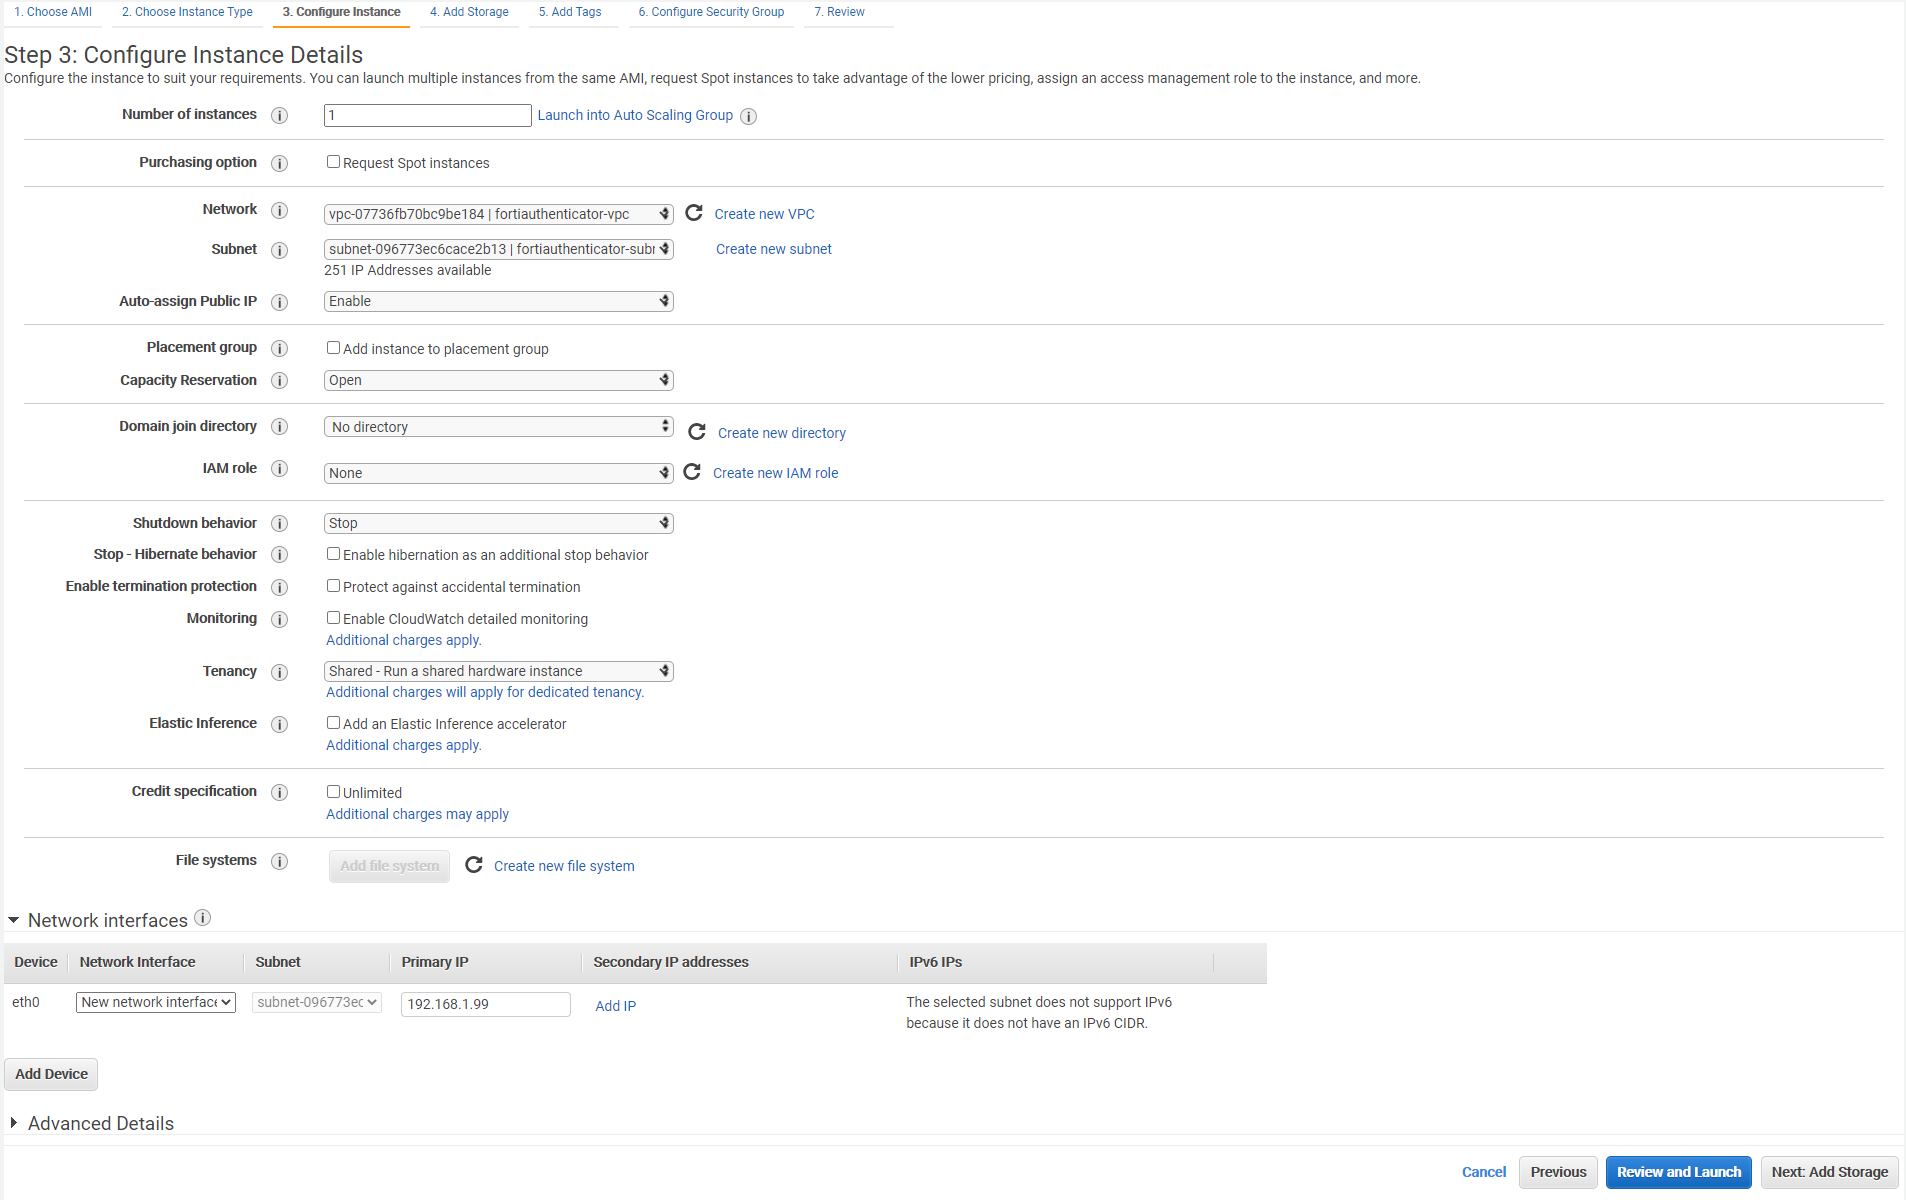
- Click Next: Add Storage.
- For Step 4: Add Storage, ensure that the size of the second volume is at least 8 GB, and then click Next: Add Tags.
- For Step 5: Add Tags, provide any tags that will aid you in managing your FortiAuthenticator VM instance, and then click Next: Configure Security Group.
- For Step 6: Configure Security Group, you define a set of firewall rules that control the traffic for your instance. Select an existing security group or create a new security group. If Create a new security group is selected, a security group is generated for you based on recommended settings for the FortiAuthenticator instance.
- Click Review and Launch.
- Review the details you have specified, and then click Launch.
The Select an existing key pair or create a new key pair dialog box appears. - From the dropdown, select Choose an existing key pair.
- From the Select a key pair dropdown, select a key pair.
Before proceeding, confirm that you have the private key file for the selected key pair. The private key file can be obtained when a new key pair is created. To create and a key pair, from the EC2 Management Console, under Network & Security, click Key Pairs. - Select I acknowledge that I have access to the selected private key file.
- Click Launch Instances.
The instance of FortiAuthenticator deploys on EC2. The process can take several minutes to complete. You can view the status of the deployment process from the EC2 console. When the deployment process is finished and the FortiAuthenticator-VM is provisioned and powered up, access the FortiAuthenticator-VM to complete the post-deployment setup. See Connecting to FortiAuthenticator.
